REVIEW · MALIBU
Malibu: Electric-Assisted Mountain Bike Tour
Book on GetYourGuide →Operated by Rock n Rope Adventures · Bookable on GetYourGuide
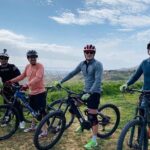
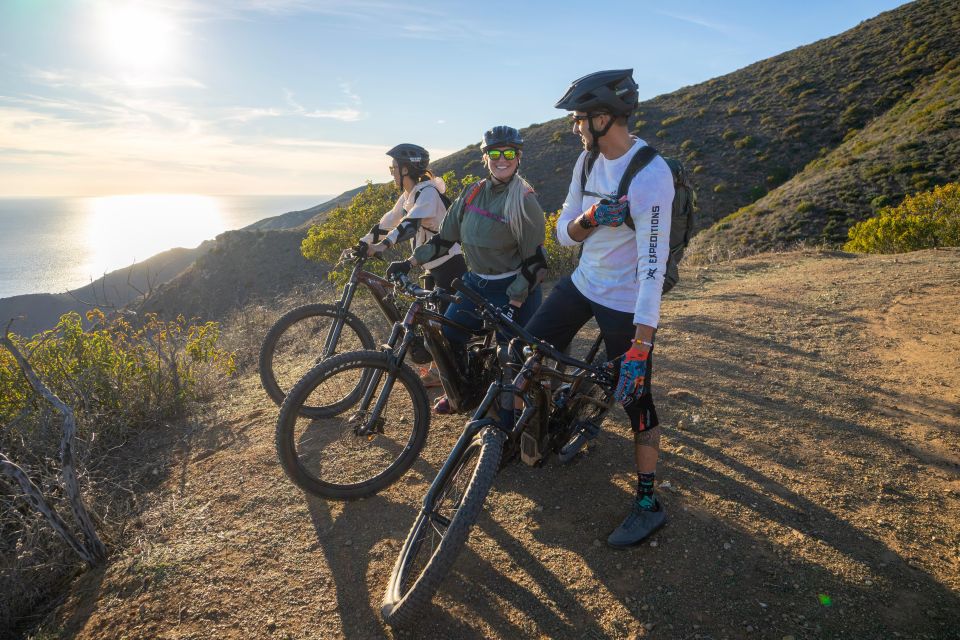
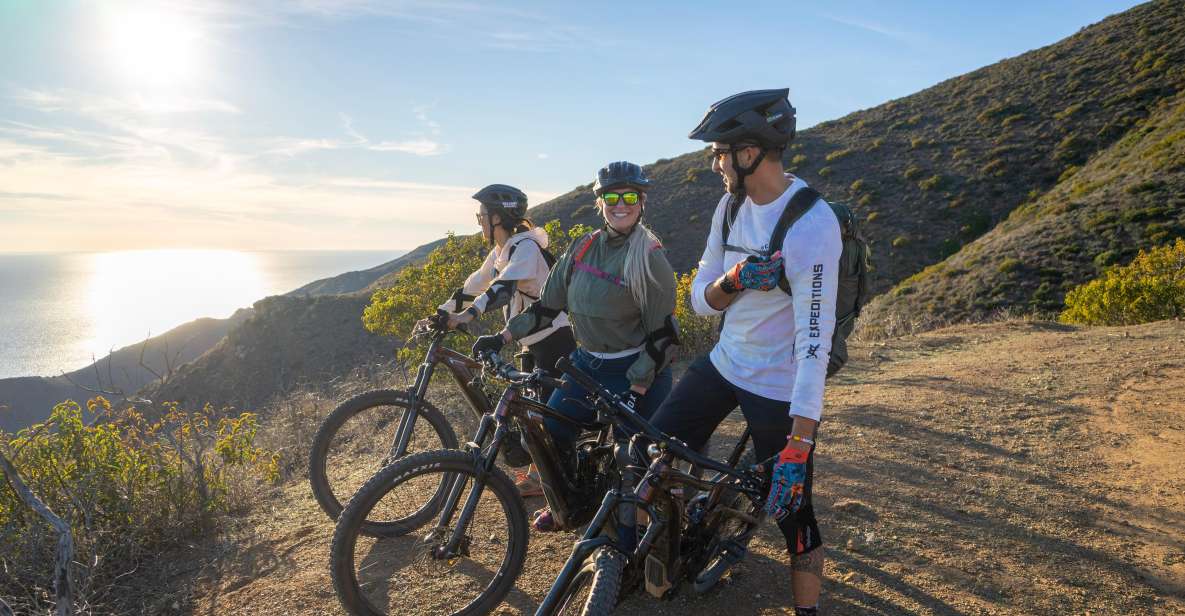
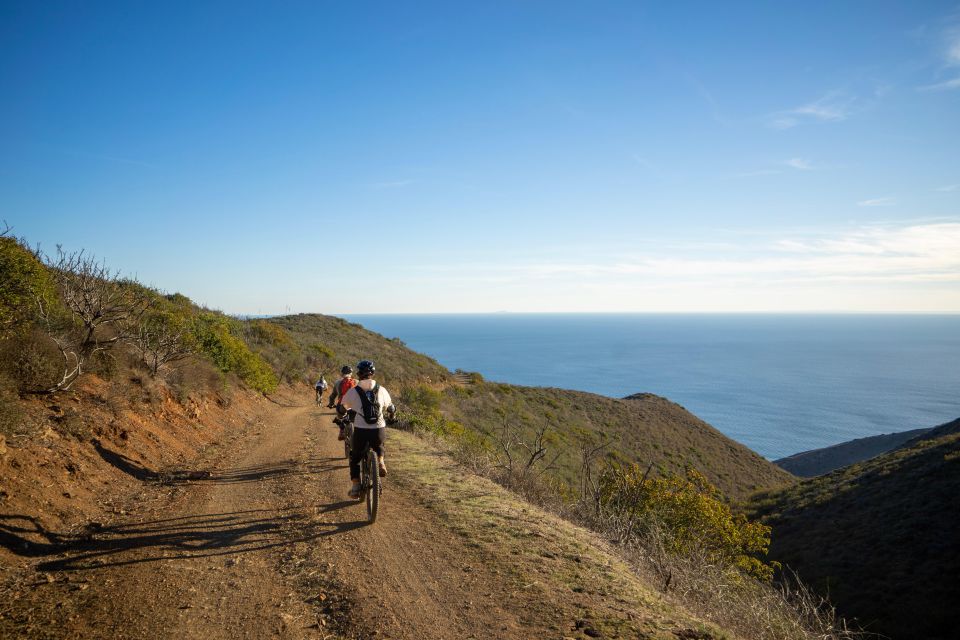
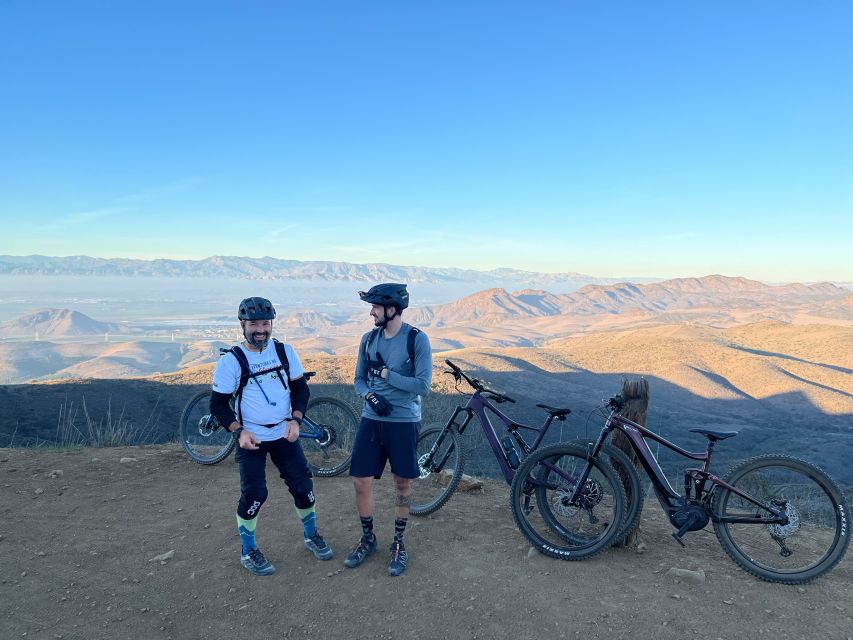
Electric bikes plus Malibu trails sounds like trouble. In a good way. This tour pairs high-powered e-MTBs with expert coaching so you can ride the Santa Monica Mountains without turning your legs into mashed potatoes. Expect big Malibu coastline views, techy but approachable bike handling, and a loop ride that brings you back to where you started.
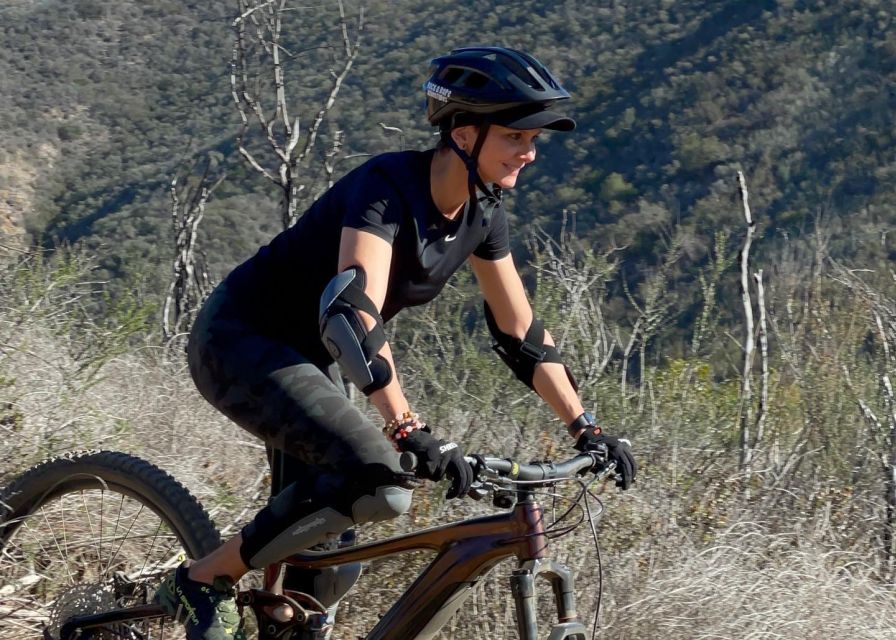
Two things I really like: the bikes themselves, a Giant full-suspension setup with Smart Assist you can dial up or down, and the way the guide breaks down technique so first-timers feel in control. One rider’s experience with guide Roger centered on quick skill coaching, then real trail fun like crossing creeks near the base of Sycamore Canyon before climbing toward wide-open viewpoints. The main thing to consider is the physical reality: the route can include loose rock, gravel, singletrack, and uphill and downhill stretches, so you’ll want at least basic bike comfort and the right expectations for a mountain ride.
In This Review
- Key Things to Know Before You Go
- Santa Monica Mountains, Electric-Assisted: Why This Ride Feels Fair
- The Bikes: Giant Full-Suspension e-MTBs and Smart Assist Control
- How the 150 Minutes Typically Run From Parking Lot to Viewpoints
- Terrain Choices: Fire Roads vs Singletrack and How to Pick Your Comfort Level
- What the Guide Does That Makes First-Timers Feel Capable
- Included Gear vs What You Should Pack
- Weather, Timing, and What Rain or Shine Really Means
- Small Group Size: Why Max 5 Riders Matters on Mountain Bikes
- Price and Value: Is $199 Worth It for 150 Minutes?
- Who Should Book This Tour (and Who Should Skip It)
- Practical Tips That Make the Ride Smoother
- Should You Book This Malibu Electric-Assisted Mountain Bike Tour?
- FAQ
- How long is the Malibu electric-assisted mountain bike tour?
- What does the tour cost?
- What’s included in the price?
- What should I bring since food isn’t included?
- Where do I meet the guide?
- Is the tour rain or shine?
- Do I need mountain biking experience?
- What types of terrain should I expect?
- Is there a height requirement?
- Can I get a refund if I cancel?
Key Things to Know Before You Go
- Giant full-suspension electric-assist bikes make rough trails more manageable
- Smart Assist control lets you choose workout effort vs. full power comfort
- Small group (max 5) means you get more attention and pacing control
- Views are the point: viewpoint breaks spotlight Malibu’s coastline
- Terrain can range from fire roads to winding mountain trails
- Minimum rider height: 5 feet / 150 cm
Santa Monica Mountains, Electric-Assisted: Why This Ride Feels Fair
Malibu’s hills are beautiful, and they’re not subtle. Even on a regular mountain bike, you’d be thinking about elevation the entire time. The electric-assist factor changes the game because it keeps you moving efficiently through climbs, so the tour becomes about riding skill and scenery, not just survival.
What makes this tour especially appealing is the balance of effort and reward. You get the satisfaction of trail biking, but the assist helps you stay in the ride instead of constantly dismounting. That matters for beginners and for anyone who wants to see more of the coastline viewpoints without losing the joy halfway up the hill.
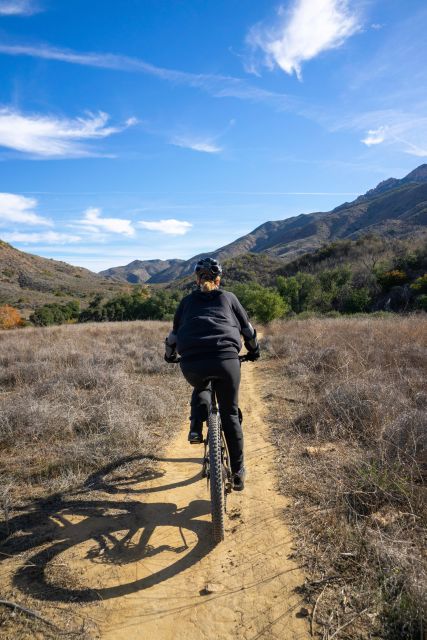
And yes, the setting is real mountain riding. Expect winding paths, uneven footing, and enough ups and downs to feel like you earned the views. You’re not floating on a flat sidewalk cruise.
You can also read our reviews of more cycling tours in Malibu
The Bikes: Giant Full-Suspension e-MTBs and Smart Assist Control
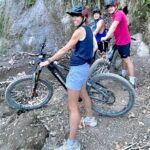
This is not a wobble-prone e-bike. You’ll be on Giant full-suspension electric-assist mountain bikes designed to handle trail impacts. Suspension isn’t just a comfort feature. It helps you keep traction and control when the trail turns rougher, especially on gravel, loose rock, and uneven singletrack.
The big win is the Smart Assist system. You can adjust assistance to match your mood:
- Want a smoother ride and easier climbs? Use stronger assistance.
- Want more workout and a more hands-on effort? Dial it back.
That flexibility is also how the tour works for mixed skill levels. A confident rider can push for a more vigorous pace. A cautious rider can lean on assist to focus on line choice and bike handling.
A small caution: you’re still responsible for reading the terrain. The assist helps you climb and move through the ride, but it can’t cancel gravity on descents or swap out your attention for you.
How the 150 Minutes Typically Run From Parking Lot to Viewpoints
Your tour starts at the campground parking area where you meet your guide at a yellow FJ cruiser. After you enter the campground, you’ll make a left after the camping booth toward the day use area, and you’ll want to have your parking ticket ready to display on your dashboard.
Once you’re mounted, the guide focuses on getting you comfortable fast. Expect an overview of the bike and mountain biking basics before you head onto the trail. This is where first-timers tend to relax, because you learn how to handle the bike on rougher ground and how to move your body to stay stable.
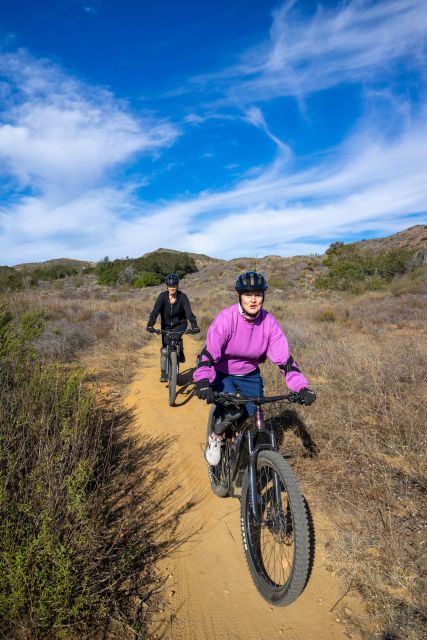
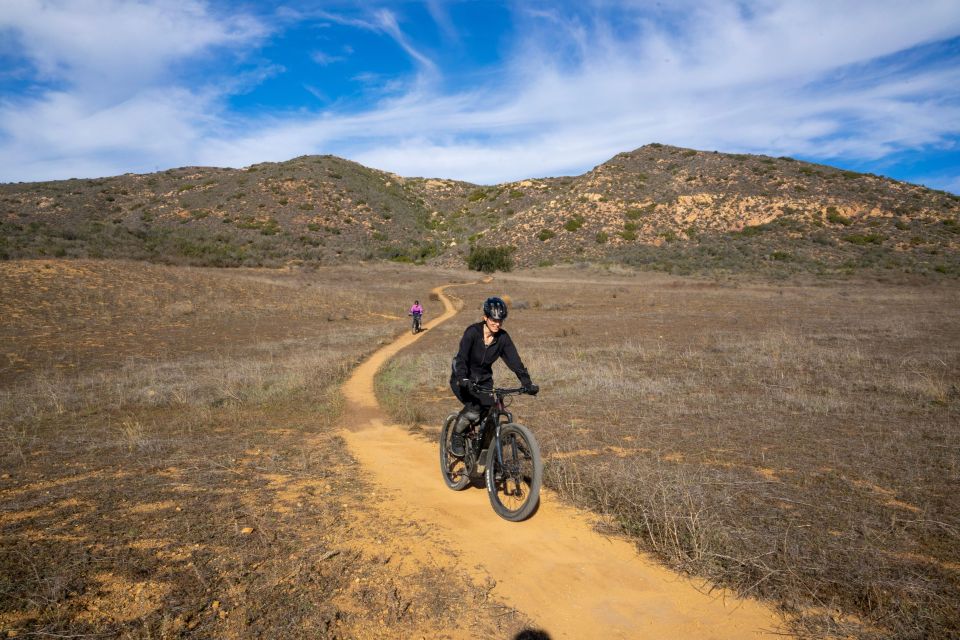
From there, the ride follows the rhythm of Santa Monica Mountains trail biking:
- You begin with trail segments that ease you into traction and balance.
- Then you hit more scenic, more textured trail moments.
- You climb to higher viewpoints with breaks to take in the Malibu coastline.
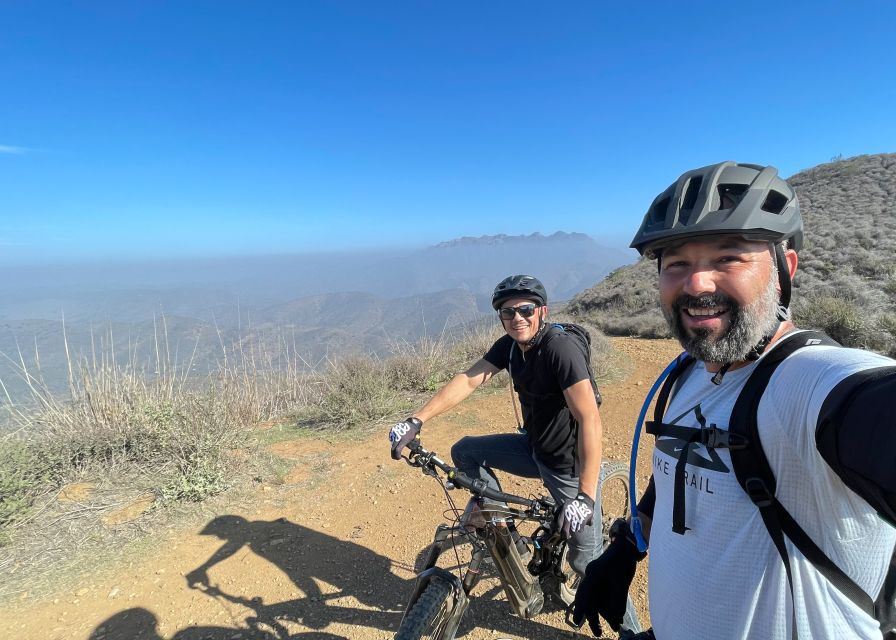
- You work your way back toward the start in a loop format.
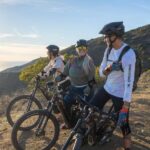
In one recent ride example, the route included creek crossings near the base of Sycamore Canyon, followed by a climb that opened up spectacular views in every direction. That mix is the heart of why this tour works: you get both technical trail flavor and payoff views, without turning the whole ride into one long slog.
Breaks at picturesque lookouts are built in. Plan on stopping, catching your breath, and taking photos while the coastline is framed around you.
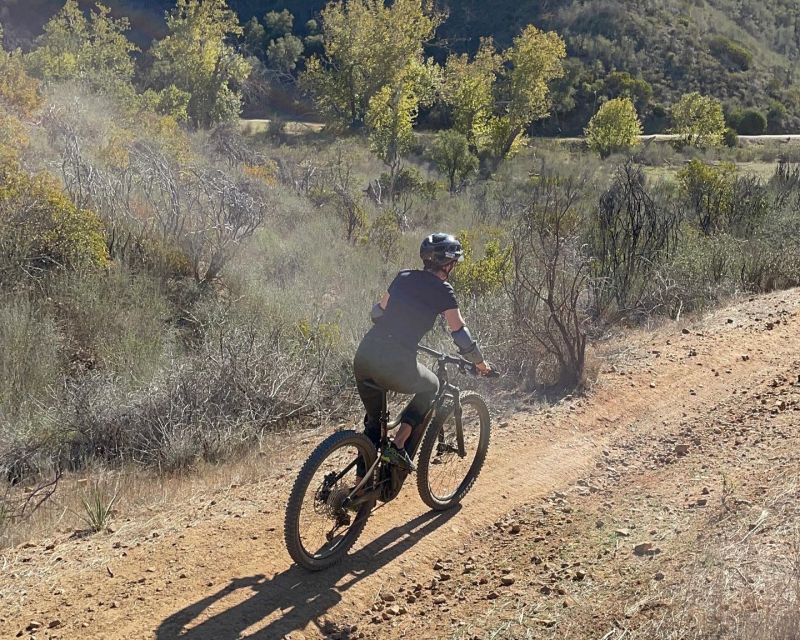
Terrain Choices: Fire Roads vs Singletrack and How to Pick Your Comfort Level
One of the best parts of this tour is the ability to tailor the route to your group. That can mean more mellow segments on fire roads or more challenging routes on mountain trails and winding singletracks.
Here’s how to think about it before you choose:
- If you’re new to mountain biking, start with the terrain that keeps you relaxed—fewer technical surprises, smoother lines, and more time to focus on technique.
- If you’re comfortable on bikes and enjoy managing uneven footing, you can push toward the more demanding singletrack options.
You’ll still encounter real trail conditions. The route may include loose rock, gravel, winding single tracks, and both uphill and downhill sections. Loose rock and gravel demand you ride with control and avoid sudden braking. Singletrack means you’ll likely be threading your bike through tighter turns where balance matters.
The good news: the assist plus coaching helps you make better decisions on the fly. You can ride at your own pace and adjust assistance to stay in a safe comfort zone.
What the Guide Does That Makes First-Timers Feel Capable
A great tour doesn’t just hand you a bike and point you downhill. It teaches you what to do with the bike once you’re out there.
In particular, guide Roger’s approach (when he’s leading) is built around clear, practical instruction. The key theme is getting you comfortable with maneuvering the electric-assist bike quickly, so you spend less time worrying and more time riding.
Expect guidance on basics like body position, how to control your speed, and how to move over changing surfaces. Then you’ll practice while the trail and viewpoint stops add natural motivation.
This matters more than people think. Mountain biking is half skill, half confidence. A guide who helps you get confident early can turn a first ride into something you want to repeat.


Included Gear vs What You Should Pack
You’ll be provided with the riding essentials:
- Electric assisted mountain bike rental
- Helmet
- Knee and elbow pads
- Gloves
That takes a lot of guesswork away. You can show up without shopping for personal protective gear.
Still, don’t forget what you’ll need for comfort and safety in a sun-and-hills setting. Bring:
- Sunglasses
- Snacks
- Sunscreen
- Water
- Long-sleeved shirt
- Long pants
- Closed-toe shoes
Yes, no food is included. So if you get hungry (and you will, even with assist), plan to snack during the breaks. Also, long sleeves and long pants help with sun and minor trail abrasions. Closed-toe shoes are a must for control on pedals and uneven footing.
Weather, Timing, and What Rain or Shine Really Means
This tour runs rain or shine. That’s not a “maybe.” It’s the plan.
Rain changes trail behavior. Gravel gets slick. Loose rock becomes extra sketchy. You’ll want to pay attention to how the assist feels when traction drops, and you’ll likely be moving a bit more cautiously through the rougher bits.
The timing is also designed around focus and energy. At 150 minutes, you’re not stuck on a half-day mission. It’s long enough for a real trail experience and a couple scenic breaks, but short enough that you can enjoy the ride rather than drag through it.
Small Group Size: Why Max 5 Riders Matters on Mountain Bikes
This is a small group tour limited to 5 participants. That detail matters because trail riding is not a one-size-fits-all sport.
With fewer riders, the guide can:
- Adjust pacing when someone needs more time
- Watch technique and offer quick corrections
- Keep the group safe when the terrain gets rougher
It also makes the tour feel more personal. You’re not shouting over wind and distance while waiting for the leader to pass. You can ask questions and get answers without feeling rushed.
For value, this is a big deal. You’re paying for a guided, coached outdoor experience, not just bike rental.
Price and Value: Is $199 Worth It for 150 Minutes?
At $199 per person for 150 minutes, this sits in the “pay for coaching and access” category, not the “cheap activity” category. So the question isn’t whether it’s affordable. It’s whether it delivers enough value.
For me, the strongest value points are:
- You get the bike, protective gear, and a live guide
- The coaching helps you ride better and feel safer
- You see elevated viewpoints of Malibu without needing to plan logistics for the trail route yourself
- The electric-assist bike and Smart Assist control create a wider comfort range for different skill levels
If your goal is scenic riding plus guidance, it’s easier to justify. If your goal is purely casual, flat sightseeing, you might find a simpler option fits better. But for a guided mountain bike experience with real coaching, this price feels reasonable.
Who Should Book This Tour (and Who Should Skip It)
This tour is made for people who want Santa Monica Mountains trail time and Malibu views with training wheels off, but fear dialed down.
It’s a good fit if you:
- Can ride a bike at a basic level
- Want to tackle climbs with electric assist rather than grinding for every meter
- Like scenic breaks and a guided route choice based on comfort
It’s not a fit if you:
- Are pregnant
- Use a wheelchair
- Are under the minimum height requirement of 5 feet / 150 cm
Also, if you’re expecting an effortless ride with no rough terrain, set expectations carefully. The route can include loose rock, gravel, singletrack, and hills.
Practical Tips That Make the Ride Smoother
A few small choices can make this tour more fun:
- Wear long pants and closed-toe shoes even if it’s warm. Trail friction is real.
- Bring water and a snack. No food is included.
- Start with a moderate Smart Assist level. You can always boost later when the terrain gets tougher.
- Listen early to technique coaching. The first part of the ride is when you lock in control for everything that comes after.
And keep your camera handy for the viewpoint breaks. The payoff is the reason you’ll be happy about the climb.
Should You Book This Malibu Electric-Assisted Mountain Bike Tour?
I’d book it if you want a guided Santa Monica Mountains ride with real scenery payoff and a bike system that lets you control effort. The combination of electric-assist plus Smart Assist plus a small group makes it feel welcoming without watering down the adventure.
Skip it if you hate any chance of uneven terrain, or if you’re looking for a low-impact activity with no climbs. Also double-check height requirements before you get excited.
If you want an experience that teaches you how to handle the bike better while showing you Malibu from higher viewpoints, this is a strong choice.
FAQ
How long is the Malibu electric-assisted mountain bike tour?
The tour duration is 150 minutes.
What does the tour cost?
It costs $199 per person.
What’s included in the price?
Included are the bike tour through the Santa Monica Mountains, electric assisted mountain bike rental, helmet, knee and elbow pads, and gloves.
What should I bring since food isn’t included?
Bring snacks, water, sunscreen, sunglasses, a long-sleeved shirt, long pants, and closed-toe shoes.
Where do I meet the guide?
Meet your guide at the yellow FJ cruiser in the parking lot. Enter the campground, make a left after the camping booth toward the day use area, and follow the parking instructions.
Is the tour rain or shine?
Yes, it takes place rain or shine.
Do I need mountain biking experience?
You should know how to ride a bike at least on a basic level. The tour is designed to accommodate all ability levels with expert guidance.
What types of terrain should I expect?
The route may include loose rock, gravel, winding single tracks, and uphill and downhill stretches.
Is there a height requirement?
Yes. There is a minimum rider height of 5 feet (150 cm).
Can I get a refund if I cancel?
Yes. You can cancel up to 24 hours in advance for a full refund.